
What Causes Paper Jams? The Science Behind the Crunch
A paper jam is not bad luck — it is physics. This explainer walks the paper path from tray to output, shows exactly where and why sheets snag, and separates the causes you control (paper, loading, humidity) from the ones that need maintenance (worn rollers, tired separation pads, sensor faults). Read this to understand why your printer jams, so the fixes in our step-by-step guides actually stick instead of the jam coming straight back.
Applies to: All inkjet printers, Home and small-office lasers, Multifunction all-in-ones with an ADF, Office workgroup printers
Quick summary
- The problem
- You want to understand what actually causes paper jams — not just how to clear one — so you can stop them coming back.
- The fix
- Jams happen when the smooth hand-off along the paper path breaks down: paper that is too damp, curled, dusty or wrongly loaded fails to feed cleanly, or worn rollers and separation pads either grab two sheets at once or lose grip entirely. Match the cause to the symptom, fix the underlying factor rather than just yanking the sheet, and jams become rare.
- Applies to
- Every printer that moves cut sheets — home inkjets, home and office lasers, and multifunction all-in-ones with an automatic document feeder. The exact rollers, sensors and jam-clearing doors vary by model, so we describe the principles and qualify the specifics.
On this page Show
Understanding the problem
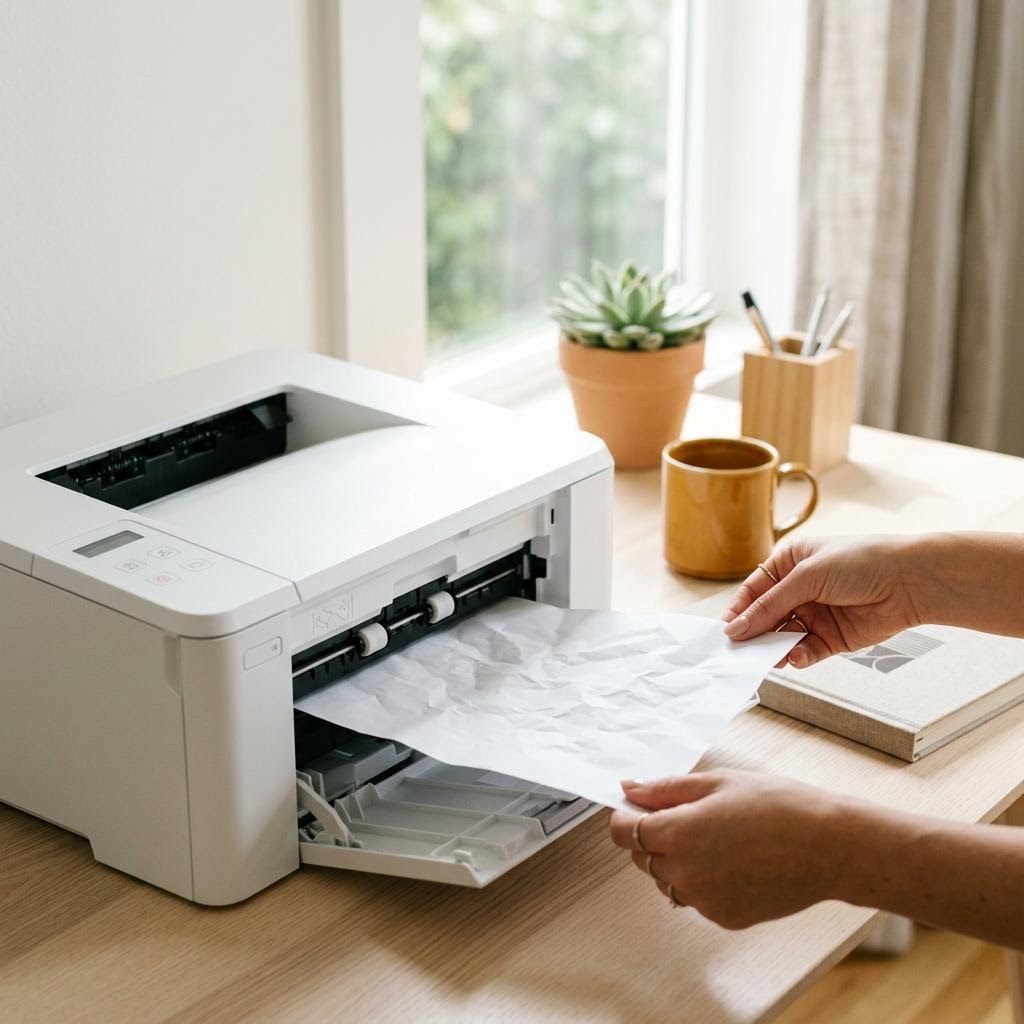
A paper jam feels random, but it almost never is. Every printer moves a sheet through a precise sequence — the paper path — using rollers that grip and turn, guides that steer, sensors that watch, and a mechanism that separates exactly one sheet from the stack. A jam is what happens when that sequence breaks down: the sheet stops moving, or moves at the wrong moment, while the motors keep driving. The paper has nowhere to go, so it buckles, folds or tears, and the printer trips a jam error to protect itself. Knowing the sequence is the whole game, because it tells you which link in the chain failed.
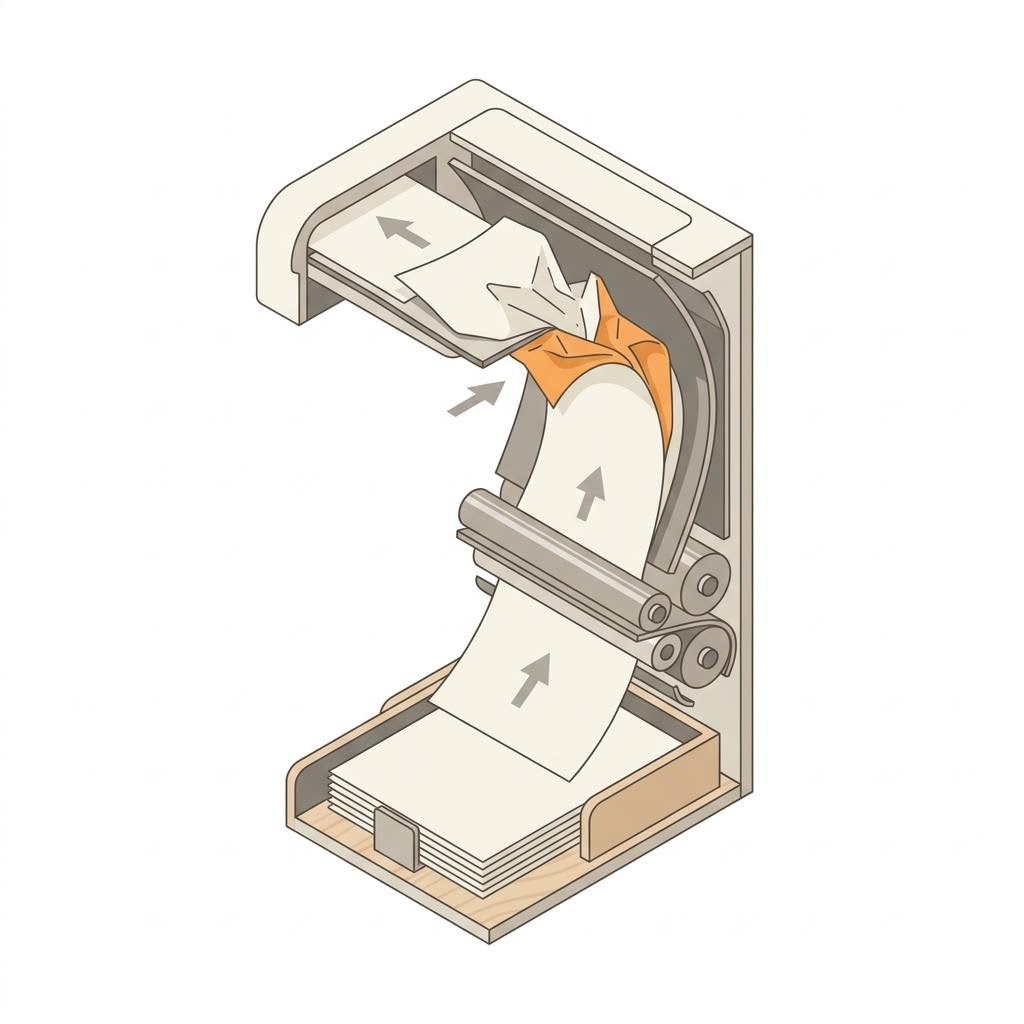
The journey starts in the tray, where a pickup roller presses down and pulls the top sheet forward. Immediately a separation pad or separation roller acts as a gentle brake on the sheets beneath, so only one leaves the stack — this single step prevents most multi-sheet jams when it works and causes them when it wears out. From there the sheet is handed to feed rollers that carry it along the path, past registration rollers that square it up and time its arrival, through the print zone (over the platen on an inkjet, between the drum and the heated fuser on a laser), and finally out to the tray. Duplex models add a second lap: the sheet reverses and re-enters to print the back.
Most jams cluster at the transition points — where the sheet is picked up, where it turns a corner, and where it enters the fuser or duplex path. These are the moments when timing, grip and paper condition all have to line up. Miss any one of them and the sheet stalls. That is why two printers in the same office can jam for completely different reasons: one has a worn pickup roller that grabs two sheets, another sits by a damp window so its paper has curled at the edges.
It helps to split causes into two families. The first is paper and handling — the things you control: the type, weight and moisture of the paper, how squarely it sits in the tray, whether the guides are snug, and whether a stray label, staple or torn scrap is lurking in the path. The second is wear and hardware — the things maintenance addresses: rubber rollers that go smooth and lose grip after tens of thousands of pages, separation pads that stop braking, and the sensors that decide whether a jam has occurred. The vast majority of household jams are in the first family, which is good news, because those are free to fix.
Humidity deserves its own mention because it is the quiet culprit behind so many mystery jams. Paper is hygroscopic — it absorbs and releases moisture from the air. Damp paper goes limp and wavy and sheets cling together; bone-dry paper builds static and also clings. Either way the separation step struggles, and the sheet that should feed alone brings a friend, or feeds skewed. A ream left open on a shelf for months behaves very differently from a freshly opened one, even if it looks identical.
Finally, a word on the fuser and the automatic document feeder, because they cause the jams people fear most. On a laser printer the fuser bonds toner to the page with heat and pressure, and a sheet that stalls there is the reason you must never rush a laser jam — the area is genuinely hot. The ADF, meanwhile, is a miniature paper path of its own on the scanner lid, feeding originals past the scan sensor, and it jams for the same reasons the main tray does: worn feed rubber, stapled or crumpled originals, or an overfilled tray.
Quick fact
Duplex means double-sided
Duplex printing prints on both sides of the paper automatically. If your printer lacks it, you can print odd pages, flip the stack, and print the even ones.
At-a-glance comparison
How the options stack up on the factors that matter most.
Jam symptom → most likely cause
Match what you see when the jam happens to the part of the paper path that usually failed. Use it to decide what to check, not as a diagnosis.
| What you see | Most likely cause | Where in the path |
|---|---|---|
| Two or more sheets pulled at once | Worn separation pad/roller, or damp sheets clinging | Pickup and separation, at the tray |
| Sheet never leaves the tray ("no paper") | Glazed pickup roller losing grip, or overfilled tray | Pickup roller, at the tray |
| Sheet feeds crooked, then jams | Loose paper guides, mixed stack, or curled paper | Registration, early in the path |
| Sheet stops halfway with a fold | Obstruction, worn feed roller, or heavy/thin media | Feed rollers, mid-path |
| Jam near the back or output with warm paper | Fuser-area stall, wrong media type setting | Fuser / print zone (laser) |
| Repeat jams only on two-sided jobs | Duplex path timing, curl, or too-heavy paper | Duplex unit, second pass |
Typical patterns only — exact rollers, sensors and doors vary by model and technology. When in doubt, follow your printer manual for its specific jam zones.
Paper choice and its effect on jamming
Media is the single biggest factor most people can control. These are typical behaviours for common paper types in a home or office printer.
| Paper type | Typical weight | Jam tendency | Notes |
|---|---|---|---|
| Standard plain copy paper | About 75–90 gsm (20–24 lb) | Low | The safe default; most printers are tuned for this range. |
| Lightweight / recycled | About 60–70 gsm | Medium | Thin or dusty sheets skew and multi-feed more easily. |
| Cardstock / heavy stock | About 160–300 gsm | Medium to high | Use the manual-feed tray and check the rated maximum weight. |
| Glossy / photo paper | Varies widely | Medium to high | Coated sheets cling; fan the stack and set the right media type. |
| Labels / envelopes | Varies | High | Only if the model supports them; peeling labels can foul rollers. |
| Damp or long-open paper | Any | High | Absorbed moisture makes sheets wavy and sticky — store sealed. |
Weights and tendencies are industry-typical ranges and vary by printer, paper brand and climate. Always check your printer's supported media list and maximum weight before loading unusual stock.
The two families of jam causes
Roughly how the causes split, and who fixes each — a quick mental model for where to look first.
| Factor | You control (paper & handling) | Maintenance controls (wear & hardware) |
|---|---|---|
| Typical share of home jams | The large majority | A smaller share, rising with page count |
| Example causes | Damp/curled paper, loose guides, overfilled tray, stray scraps | Glazed pickup rollers, worn separation pad, sensor faults |
| Cost to fix | Free — better storage, loading and settings | Low to moderate — cleaning or replacing roller/pad kits |
| When it shows up | Any time, often after a paper or weather change | Gradually, after tens of thousands of pages |
The split is a general guide, not a measured statistic — the balance shifts with how much you print, the paper you use and your environment.
Signs you're in the right place
If you're seeing any of these, this guide is for you.
-
The same jam keeps coming back
You clear the sheet, print again, and it jams in the same place — a sign of an underlying cause (a worn part, wrong media, or a hidden scrap) rather than a one-off.
-
The printer grabs two sheets at once
Pages come out doubled or the jam reveals two sheets fed together — classic separation-step trouble from a worn pad or clingy, damp paper.
-
It says "no paper" with a full tray
The tray is loaded but the printer cannot pick a sheet up — usually a pickup roller that has lost grip, or paper loaded above the fill line.
-
Jams appear only with certain paper
Plain paper is fine, but cardstock, photo paper, envelopes or labels jam — a media-and-settings signal rather than a broken printer.
-
Two-sided prints jam but one-sided are fine
Simple jobs work, but duplex jobs snag on the second pass — the sheet is struggling through the reverse path, often due to curl or heavy paper.
-
You want to prevent jams, not just clear them
You are less interested in the emergency and more in understanding the mechanism so it stops happening at all.
What's usually behind it
The most common reasons this happens, so the fix makes sense.
Paper condition — moisture, curl and dust
The most common driver of everyday jams. Paper absorbs humidity and goes wavy or limp; static in dry air makes sheets cling; and paper dust builds up on rollers over time. Any of these breaks the clean one-sheet hand-off at the tray.
Loading and tray setup
How you load matters as much as what you load. An overfilled tray, guides that are too loose or too tight, a mixed stack of weights, or sheets that were not squared off all skew the sheet and cause it to snag or feed crooked.
Worn pickup rollers and separation pads
Rubber rollers grip by friction, and that rubber glazes smooth after tens of thousands of pages. A tired pickup roller cannot lift a sheet reliably; a worn separation pad stops braking the stack, so several sheets feed at once.
Wrong media type or an unsupported stock
Feeding paper heavier, thinner or more coated than the printer or the current setting expects changes how the sheet flexes and grips. The wrong media-type setting can also mis-time the fuser on a laser, stalling the sheet.
Obstructions and foreign objects
A torn scrap left behind from an earlier jam, a stray staple, a paper clip, a peeled label or even a small toy in a home printer will catch passing sheets. These cause stubborn, repeating jams until the object is found and removed.
Sensor and mechanical faults
Printers detect jams with optical or mechanical sensors along the path. A dusty or failed sensor can report a jam that is not there, or miss the timing of a real one. Motor, gear or duplex-unit faults are rarer but do occur with age.
What you'll need
Have these on hand before you start for a smooth fix.
-
Your printer manual or model number
Jam zones, clearing doors and supported paper weights differ by model. Knowing your exact model lets you match the general principles here to your specific machine and its official support pages.
-
A fresh, sealed ream of standard paper
The single best diagnostic tool. Swapping in known-good, dry, standard-weight paper instantly tells you whether the problem is the media or the machine.
-
A torch and a lint-free cloth
To look inside the paper path for scraps and to wipe rollers. Never poke at rollers with sharp tools, and let a laser cool before reaching near the fuser.
-
A little patience for the fuser area
On a laser printer the fuser gets genuinely hot. If a jam is near the back or the sheet feels warm, wait for the printer to cool before clearing it.
How to fix it
Work through these in order — they run from the quickest checks to the more advanced fixes.
-
Step 1: Picture the whole paper path first
Before touching anything, build a mental map of where the sheet travels: it is lifted from the tray, separated so only one leaves, carried by feed rollers, squared up and timed, sent through the print zone, and pushed out to the top tray. Duplex models send it round a second time to print the back.
A jam is a break somewhere along that line. So the useful question is not "why does my printer jam?" but "at which point did the sheet stop?" — because the answer points straight to the cause. A sheet that never leaves the tray is a pickup problem; one that folds at a corner is a feed or media problem; one stuck warm at the back is a fuser problem.
Every printer has doors and levers that open the path so you can see these stages. Locating them on your model in advance — from the manual or the labels inside the covers — turns a stressful jam into a two-minute inspection.
Why this works: Almost every jam-clearing mistake comes from treating the printer as a black box and yanking the visible sheet. Understanding the path lets you find the real snag point and clear it without tearing paper or damaging rollers.
Expected result: You can describe, in order, the stages a sheet passes through in your printer and roughly where each jam zone sits.
Our error-code library at /error-codes can help if your printer shows a specific jam or media code alongside the physical symptom — codes often name the exact zone that tripped.
-
Step 2: Start at the tray: loading and paper condition
Most jams are born at the tray, so inspect it first. Take the stack out, tap it square on a flat surface, fan the edges to break any static cling, and reload it below the maximum-fill line. Then slide the paper guides so they just touch the stack — snug, not squeezing.
Look hard at the paper itself. Curled corners, a wavy surface, or sheets that feel soft and cool to the touch all point to absorbed moisture. Do not mix weights or types in one tray, and never top up a half-used tray with a different batch.
If jams are frequent, swap in paper from a freshly opened, sealed ream of standard copy weight. This one change resolves a large share of household jams outright, because it removes the moisture, curl and mixed-stack variables in a single move.
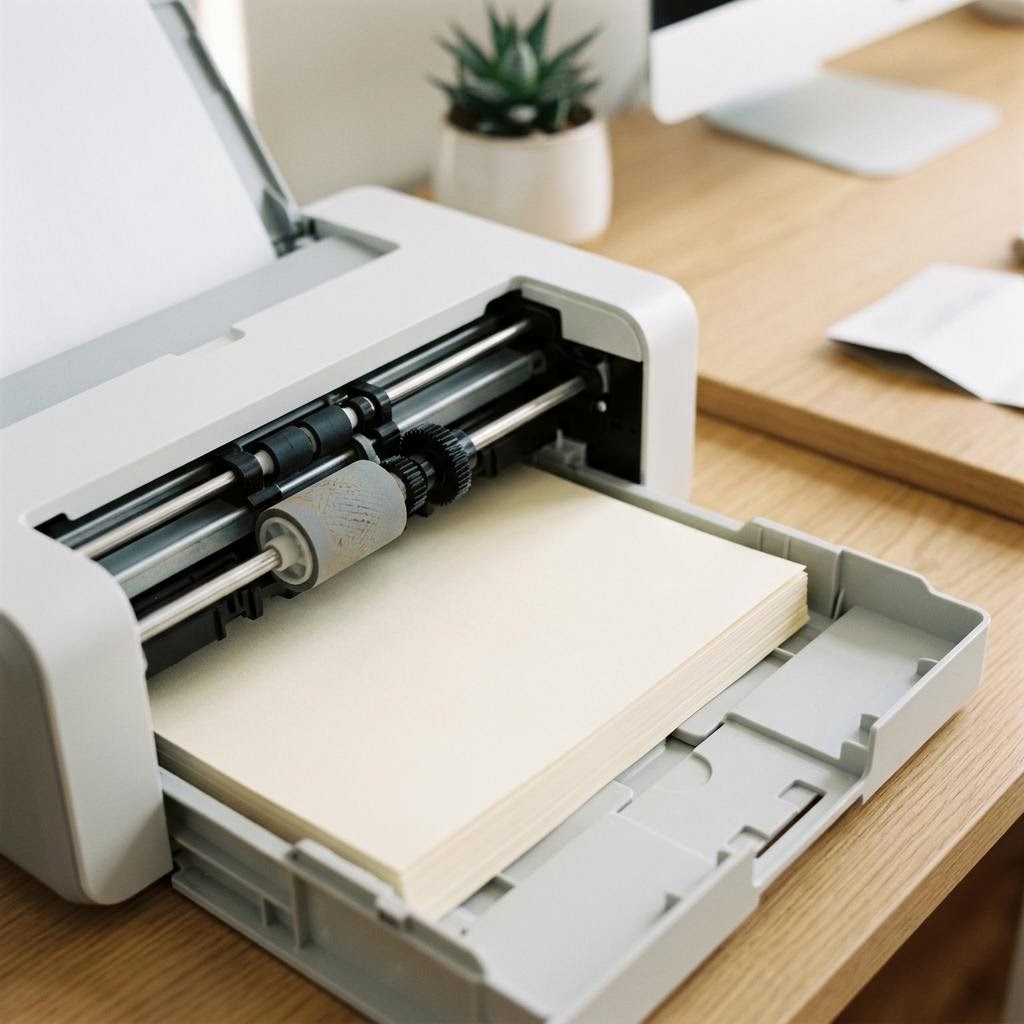
The pickup roller (top) presses on the stack and pulls the top sheet forward while a separation pad brakes the rest. Squared, dry paper loaded to the fill line lets that hand-off work exactly once per sheet. Why this works: The pickup and separation step depends entirely on paper that is flat, dry and squarely loaded. Fix the input and you fix the most common jams before they ever reach the rollers.
Expected result: A neatly squared, correctly loaded stack of fresh standard paper with the guides just touching it — and, often, jams that simply stop.
Store paper flat, sealed in its wrapper, in a room-temperature spot away from damp basements, sunny windowsills and radiators. Only unwrap what you will use soon.
-
Step 3: Understand the separation step and multi-sheet feeds
When two or more sheets feed at once, the separation step has failed. A separation pad or separation roller is meant to hold back the sheets beneath the top one, so only a single page leaves the stack. When it works you never notice it; when it wears smooth, pages come through in pairs and jam.
Two things defeat separation: worn rubber and clingy paper. Damp or freshly cut paper sticks to itself, and static in very dry air does the same, so fanning the stack before loading genuinely helps. If good, fanned paper still multi-feeds, the pad or roller has likely glazed with age.
Multi-feeds are not just a jam risk — they waste paper and can smear toner. Treat a printer that regularly grabs two sheets as due for a separation-pad or roller service, especially if it has printed many tens of thousands of pages.
Why this works: Separation is the least understood part of the path and the cause behind the frustrating "why did it take two sheets?" jam. Knowing it exists tells you whether to blame the paper or the part.
Expected result: You can tell a paper-cling multi-feed (fixed by fresh, fanned paper) from a worn-pad multi-feed (fixed by a service).
Separation pads and roller kits are inexpensive consumables on many models and are designed to be replaced. Check your model's maintenance schedule for its rated page count.
-
Step 4: Feed rollers, grip and the role of wear
Once a sheet is picked up, feed rollers carry it along the path by friction. That grip depends on clean, slightly tacky rubber. Over time paper dust and the rubber's own ageing glaze the surface smooth, and grip fades — so the sheet slips, stalls or arrives late and jams.
You can often restore grip without new parts. With the printer off and cool, wipe the accessible rollers gently with a lint-free cloth lightly dampened with water (or the cleaner your manual specifies), then let them dry fully. Turn rollers by hand rather than forcing the sheet, and never use sharp tools.
If cleaning only helps for a while and grip keeps fading, the rollers have reached the end of their service life. On many printers these are user-replaceable maintenance kits rated for a set number of pages.
Why this works: Feed-roller wear is the most common hardware cause of jams and the reason a printer that "used to be fine" starts snagging. Cleaning buys time; knowing when to replace ends the cycle.
Expected result: Rollers that grip cleanly and carry a sheet smoothly along the path, or a clear signal that a replacement kit is due.
Resist the temptation to use household solvents or abrasive pads on rollers — they can degrade the rubber and make grip worse. Follow the manufacturer's cleaning guidance.
-
Step 5: Match the media — weight, type and the printer's settings
Printers are tuned for a range of paper. Feed something much heavier, thinner or more coated than expected and the sheet flexes and grips differently, so it stalls at a corner or in the print zone. Check your model's supported media list and its maximum paper weight before loading anything unusual.
Heavy stock like cardstock usually needs the straighter manual-feed or rear tray rather than the main cassette, because a tight bend in the path can buckle a stiff sheet. Glossy and photo papers cling and often need fanning and the correct media-type setting.
On a laser printer, the media-type setting also controls the fuser. Tell the driver you are printing on heavy or glossy stock and it adjusts heat and speed to suit; leave it on "plain" and the timing can be wrong enough to jam. Set the tray's paper type both on the printer and in the print dialog.
Why this works: Media mismatches masquerade as mechanical faults. Many "my printer keeps jamming" cases are simply the wrong paper in the wrong tray with the wrong setting — all free to fix.
Expected result: Special stock loaded in the right tray with the matching media-type setting, feeding without the buckle or stall it had on the default setting.
Envelopes and labels are the highest-risk media and only work on models that officially support them. A partly peeled label sheet can shed adhesive inside the printer, so never reuse label sheets.
-
Step 6: Hunt for hidden obstructions and torn scraps
A jam that returns the instant you print again almost always means something is still in the path. When you clear a jam, pull the sheet slowly and in the direction it was travelling so it does not tear; a small triangle of paper left behind will catch the next sheet every time.
With the printer off, open every access door and shine a torch along the path. Look for scraps, staples, paper clips and — in homes with children or pets — anything that should not be there. Remove foreign objects gently; do not scrape at sensors or rollers.
Foreign objects are the classic cause of the "I fixed it but it jams again" loop. Being methodical once, checking the whole path rather than just the obvious spot, saves repeating the whole exercise.
Why this works: Repeating jams in the same spot are the signature of an obstruction. Finding it is the difference between a permanent fix and an endless cycle of re-clearing.
Expected result: A completely clear path with no torn fragments, staples or foreign objects, and jams that no longer return immediately.
Count the pieces. If a sheet tore during clearing, make sure every fragment is out before closing the printer — a missing corner is a jam waiting to happen.
-
Step 7: The fuser and the print zone (laser and inkjet)
On a laser printer the fuser bonds toner to the page with heat and pressure, and it is the one place you must respect. A sheet stalled here will feel warm, and the surrounding metal is hot enough to burn — always let the printer cool for several minutes before reaching in, and pull any jammed sheet steadily so toner does not smear.
On an inkjet the equivalent stage is the print zone over the platen, where the sheet passes under the printhead. Jams here are usually about clearance and squareness — a curled or thick sheet catching, or a sheet fed crooked — rather than heat.
Wrong media settings cause fuser-area jams too. If the printer thinks it is fusing plain paper but you loaded heavy or glossy stock, the timing can be off enough to stall the sheet right at the exit. Correcting the media type (previous step) often cures a stubborn back-of-printer jam.
Why this works: The fuser causes the jams people most fear and most often clear unsafely. Understanding what it does explains both the danger and why media settings matter so much near the exit.
Expected result: A safely cleared exit-area jam and an understanding of why the sheet stalled there — heat timing, clearance or curl.
Never use anything metal near the fuser, and never force a sheet against the motor's direction. If a laser jam involves loose toner, wipe it up dry — warm water sets toner into fabric.
-
Step 8: Sensors, the ADF and when it is really the hardware
Printers know a jam happened because sensors along the path expect the sheet at a certain place at a certain time. A dusty or failing sensor can cry "jam" when the path is clear, or fail to catch a real one. If the printer reports a jam but you find no paper, a gentle dusting of the accessible sensor windows (per the manual) sometimes clears it.
The automatic document feeder on an all-in-one is its own miniature paper path on the scanner lid, and it jams for the same reasons the main tray does: worn feed rubber, stapled or crumpled originals, or too many sheets loaded. Treat ADF jams with the same logic — square, unstapled originals and a clean feed roller.
When fresh paper, correct loading, clean rollers and a clear path still leave you jamming, the cause is likely deeper: a worn maintenance kit past its page count, a duplex-unit fault, or a mechanical or sensor failure. That is the point to consult the manufacturer's support pages or a technician rather than keep re-clearing.
Why this works: Ruling paper and handling in or out first means that when you do reach for professional help, you know it is genuinely a hardware issue — and you can describe exactly what you have already tried.
Expected result: A clear verdict: either a fixable paper/handling/roller cause you can act on, or a genuine hardware fault to escalate with confidence.
For ADF originals, remove staples and paper clips first — they are the number-one cause of feeder jams and can also scratch the scanner glass.
Tip
Printer Tip
Store paper flat and sealed at room temperature, away from damp, sun and heat — dry, flat paper is the biggest jam-preventer there is.
Other solutions to try
If the steps above didn't do it, these fixes resolve the less common cases.
When jams cluster around the seasons or the room
If jams spike in humid summers, dry winters, or only on the printer near a window or basement, the environment is your cause — not the machine.
- Move the printer and its paper away from damp basements, bathrooms, sunny windowsills and radiators, which all change paper moisture.
- Keep paper sealed in its wrapper until use, and store only what you will print soon; a long-open ream behaves quite differently from a fresh one.
- In very dry, static-prone conditions, fan every stack before loading to break the cling that defeats the separation step.
When only heavy, glossy or specialty stock jams
If plain paper is flawless but cardstock, photo paper, labels or envelopes snag, the fix is media handling, not repair.
- Confirm the stock is within your printer's rated weight and on its supported-media list before loading it at all.
- Use the straighter manual-feed or rear tray for stiff or thick media so a tight path bend cannot buckle it.
- Set the matching media type on both the printer and in the print dialog so a laser's fuser timing suits the stock.
When the printer is simply old and high-mileage
A printer well past tens of thousands of pages will jam more as its rubber ages — that is wear, not a defect, and it responds to maintenance rather than paper changes.
- Check the model's maintenance schedule and page count; many have user-replaceable roller and separation-pad kits rated for a set life.
- Replace the kit rather than repeatedly cleaning glazed rollers that no longer hold grip for long.
- If a duplex unit, motor or sensor is failing, weigh the repair cost against the printer's value and consult the manufacturer's support pages.
Confirm it's working
Tick these off to be sure the problem is fully resolved.
Keep it from happening again
A few habits that stop this problem coming back.
- Store paper flat and sealed at room temperature, away from damp, sun and heat — dry, flat paper is the biggest jam-preventer there is.
- Fan and square every stack before loading, keep it below the fill line, and set the guides to just touch it.
- Never mix paper weights or types in one tray, and do not top up a half-used tray with a different batch.
- Match the media-type setting to the paper you loaded, and use the manual-feed tray for heavy or glossy stock.
- Clean the pickup and feed rollers periodically with a lint-free cloth per your manual, and replace maintenance kits when they reach their rated page count.
- When you do get a jam, pull the sheet slowly in its direction of travel and account for every fragment so no scrap is left to cause the next one.
Frequently asked questions
Was this guide helpful?
Your feedback helps us keep these steps accurate.
Thanks for your feedback!
Written by
The Guts Guide Editorial Team · Print Hardware & Maintenance Editor
Reviewed by
Daniel Owens · Print & Network Technician
Last updated
Jul 15, 2026
Continue Reading
Pick up where you left off with the next guide in your troubleshooting journey.
Related Guides
More troubleshooting walkthroughs you may find useful.
Buying Guides
Plain-English comparisons and pre-purchase checklists — find the right printer before you buy.



Helpful Resources
References and tools to help you go further.
-
HP Support — paper jam guidance
HP's official support portal with model-specific jam-clearing and paper-handling instructions — search with your exact model number.
-
Canon Support
Canon's official support site for PIXMA, MAXIFY and imageCLASS jam locations, supported media and maintenance procedures.
-
Epson Support
Epson's official support portal for EcoTank, WorkForce and Expression paper-path and media guidance.
-
Brother Support
Brother's official support site for jam-clearing, roller cleaning and supported paper specifications by model.