
Why Computers Slow Down Over Time and What to Do About It
A plain-English explanation of why computers become slower over time — from accumulated startup programs and background apps to fragmented storage, bloated registries, outdated drivers, and aging hardware. Understanding the real causes makes the fix obvious and prevents the slowdown from creeping back.
Applies to: Windows 10 PCs, Windows 11 PCs, Desktop and laptop computers

Quick summary
- The problem
- Your computer feels noticeably slower than it did when it was new, even though nothing obvious has changed.
- The fix
- Slowdowns are almost always caused by an accumulation of startup programs, background processes, low storage, outdated drivers, or aging hardware. Identifying which factor is dominant lets you apply a targeted fix instead of guessing.
- Applies to
- Windows 10 and Windows 11 desktops and laptops of any age or brand.
On this page Show
Understanding the problem
A computer that once felt snappy but now drags through everyday tasks is one of the most common frustrations in home and office computing. The temptation is to assume the machine is simply "getting old" and needs replacing. In the vast majority of cases, that is not true — performance has eroded for specific, fixable reasons, and understanding those reasons is the first step to reversing them.
The single most important thing to grasp is that Windows accumulates work over time. Every application you install has an opportunity to add itself to the startup sequence, plant background services, write registry entries, and consume storage. Individually each one has a tiny impact. Collectively, after months or years, they can turn a boot that took 20 seconds into one that takes two minutes and leave a machine feeling sluggish all day.
Storage is the second big factor. Windows and applications use free disk space as working room — for temporary files, virtual memory, and update staging. When that free space shrinks below roughly 10–15% of total capacity, the operating system has less room to manoeuvre and performance degrades measurably. On traditional spinning hard drives the effect is severe; even solid-state drives slow down when they approach full capacity.
Drivers and software updates play a quieter but real role. An outdated graphics driver can make the whole interface feel sluggish; outdated chipset or storage drivers reduce how efficiently the CPU and disk communicate. Conversely, a poorly written update can introduce a bug that spikes CPU or memory usage — which is why a computer can slow down immediately after an update even though the intent was improvement.
Finally, hardware ages. RAM develops errors that force the CPU to retry operations. Hard drives accumulate bad sectors that make reads slow. Thermal paste between the CPU and its cooler dries out, causing the processor to throttle its speed to avoid overheating. These are genuine hardware causes, but they are the last thing to blame — they are far less common than software-side accumulation, and they are only worth investigating after the software causes have been ruled out.
This guide walks through each category of cause in enough depth to let you identify which one is affecting your machine. Once you know the cause, the appropriate fix — whether that is trimming startup programs, freeing storage, updating drivers, or checking temperatures — follows naturally.
Best practice
Give your printer a fixed IP address
Assigning a fixed IP address helps a networked printer stay reachable, since it will not go offline when the router hands out a new address.
Signs you're in the right place
If you're seeing any of these, this guide is for you.
-
Boot time has grown from seconds to minutes
The computer takes far longer to reach a usable desktop than it did when new, and the desktop remains slow for several minutes after login while background processes settle.
-
Applications take much longer to open
Programs that once launched instantly now show a loading spinner for many seconds, and switching between open applications is noticeably sluggish.
-
The computer feels slow even when doing simple tasks
Typing in a browser, scrolling a document, or moving windows causes visible lag or stutter — tasks that should be near-instant on any modern machine.
-
The hard drive or storage indicator light is almost always on
Constant disk activity, even when you are not doing anything obvious, suggests the system is paging memory to disk or a background process is hammering storage.
-
The fan runs loudly and continuously
Sustained high fan speed indicates the CPU is working hard or running hot, which often leads to thermal throttling — the processor deliberately slowing itself down to avoid damage.
What's usually behind it
The most common reasons this happens, so the fix makes sense.
Too many startup programs and background services
Every application that starts with Windows uses CPU and RAM during boot and continues consuming resources in the background all day. After years of installing software, dozens of programs may be starting automatically — most of them never needed at boot.
Low available storage space
Windows requires free disk space to function efficiently. When a drive is nearly full, the operating system struggles to write temporary files, stage updates, and manage virtual memory, causing system-wide slowdowns.
Excessive RAM usage from background apps
Background applications, browser tabs, and system services each hold a slice of RAM. When physical memory fills up, Windows moves data to the much slower storage drive as virtual memory — a process called paging — which dramatically slows everything down.
Outdated or corrupt drivers
Drivers are the software that lets Windows talk to hardware — graphics cards, storage controllers, network adapters. Outdated or corrupt drivers can cause inefficiency, crashes, and sluggishness across the whole system, not just the device they control.
Malware or unwanted software consuming resources
Malicious software and unwanted programs installed as part of other applications often run silently in the background, consuming CPU and network bandwidth without any visible indication of what they are doing.
Thermal throttling caused by dust or dried thermal paste
A CPU that cannot dissipate heat — because vents are clogged with dust or because the thermal paste between the chip and its cooler has dried out — will automatically reduce its clock speed to stay within safe temperature limits, making the computer feel far slower than it should.
What you'll need
Have these on hand before you start for a smooth fix.
-
Access to Windows Settings and Task Manager
Both are built into Windows 10 and 11. No additional software is needed for the diagnostic steps.
-
Administrator account on the computer
Some actions — disabling startup programs, uninstalling software, updating drivers — require administrator privileges.
-
Enough free time for a full boot observation
Restart the computer and sit with it for 5–10 minutes after login to observe real startup behaviour before opening Task Manager.
-
Internet connection (for driver and Windows updates)
Downloading current drivers and updates requires an active connection. If the machine is too slow to browse comfortably, connect via Ethernet rather than Wi-Fi.
How to fix it
Work through these in order — they run from the quickest checks to the more advanced fixes.
-
Step 1: Restart the computer and observe real boot behaviour
Before changing anything, restart the computer fully (not sleep or hibernate — a true restart) and time how long it takes from pressing the power button to a fully usable desktop.
After reaching the desktop, wait five minutes before touching anything. Watch the hard drive activity light if present. This waiting period lets startup programs finish loading and gives you a realistic baseline of how slow the machine actually is at idle.
Open Task Manager (Ctrl + Shift + Esc) and click the Performance tab. Note CPU usage, RAM usage, and disk usage. If disk usage sits at or near 100% for an extended period after boot, that is a strong indicator of too many startup programs or a full drive.
Why this works: A proper restart clears cached states and gives you a clean observation window. Many people only ever use sleep, which means startup programs never fully load — making the boot seem fast but leaving the underlying accumulation untouched.
Expected result: You have a timed baseline and know whether CPU, RAM, or disk is the dominant bottleneck after boot.
-
Step 2: Check and trim startup programs
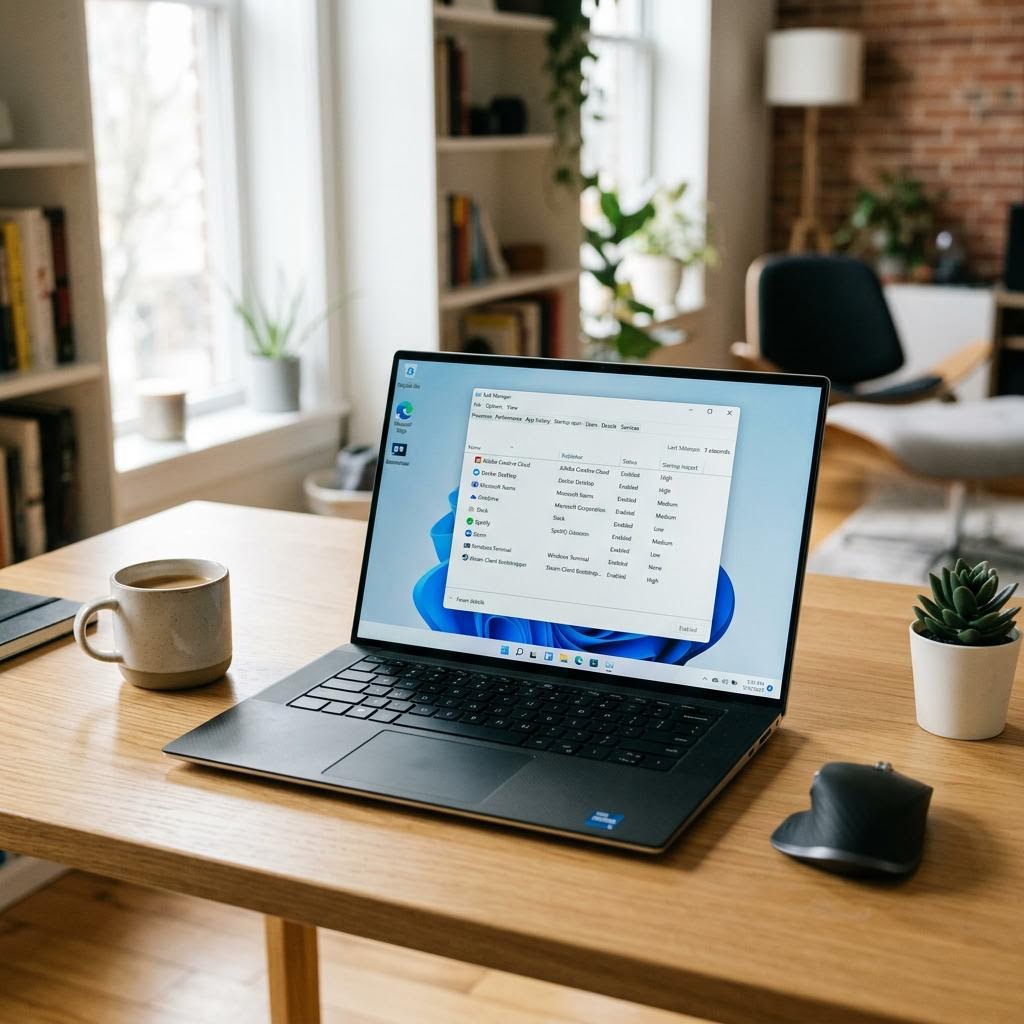
Open Task Manager and click the Startup tab (or Startup Apps in Windows 11). You will see every program that launches automatically when Windows starts, along with a publisher name and a "Startup impact" rating.
Right-click any program you do not need immediately at login — video players, cloud backup apps, manufacturer utilities, chat programs — and choose Disable. Disabling does not uninstall the program; it simply stops it from loading automatically. You can still open it manually when needed.
Be conservative: leave antivirus, audio drivers, and core system entries alone. Focus on applications from third-party software vendors whose startup presence you never requested.
Restart and time the boot again. Most users with a cluttered startup list see a meaningful improvement after this step alone.
Why this works: Startup programs are the number-one cause of slow boot times and slow post-boot performance. Each one that loads automatically adds to the CPU and disk activity that makes the first few minutes after login feel like wading through mud.
Expected result: Boot time shortens noticeably and the Task Manager disk/CPU spikes after login are smaller or shorter-lived.
If you are not sure what a program is, search its name online before disabling it. Most are safe to disable, but a few — particularly security tools and input device drivers — should be left enabled.
-
Step 3: Free up storage space
Open Settings > System > Storage (Windows 10) or Settings > System > Storage (Windows 11). The top of the page shows how full your main drive is. If it is above 85% full, storage pressure is almost certainly contributing to slowdowns.
Click "Temporary files" and let Windows calculate how much space can be recovered from Windows Update leftovers, the Recycle Bin, Downloads, and the Delivery Optimisation cache. Tick the categories you want to clear and click Remove files.
Enable Storage Sense (the toggle at the top of the Storage page) so Windows automatically removes temporary files and empties the Recycle Bin on a schedule, preventing the drive from filling up again.
If the drive is still over 80% full after cleaning temporary files, look for large files you no longer need — old videos, installer files in the Downloads folder, duplicate photos — and move them to an external drive or delete them.
Why this works: Windows and applications rely on free disk space as working room. When that space is scarce, paging, update staging, and temporary file writes all degrade, and the whole system pays the price.
Expected result: The storage bar drops noticeably and disk activity at idle reduces. Applications that were previously slow to save or open large files become more responsive.
-
Step 4: Identify high-resource background processes
Open Task Manager and click the Processes tab. Click the CPU column header to sort by CPU usage and watch for any process that consistently uses a high percentage. Do the same for the Memory and Disk columns.
Antivirus scans, Windows Update, and the Windows Search indexer legitimately spike these numbers — but only temporarily. A process that holds high CPU or disk usage for more than a few minutes at idle is worth investigating.
If you find an unfamiliar process using significant resources, search for its name online. If it belongs to software you installed and do not use, uninstall it through Settings > Apps. If it appears malicious, run a full scan with Windows Defender or a trusted tool such as Malwarebytes.
Task Manager's Processes tab sorts running programs by CPU, memory, or disk usage — the fastest way to identify what is consuming your computer's resources. Why this works: Background processes consume the same CPU, RAM, and disk bandwidth that your foreground applications need. A single runaway process can make an otherwise capable machine feel broken.
Expected result: CPU and disk usage at idle settle to low percentages, and the machine responds quickly to your input.
-
Step 5: Check and update Windows and drivers
Open Settings > Windows Update and install any pending updates. Windows updates include security patches but also performance and stability fixes — skipping them can leave known slowdowns in place.
For drivers, open Device Manager (right-click the Start button > Device Manager). Expand the Display adapters, Disk drives, and Network adapters sections. Right-click each device and choose Update driver > Search automatically. Windows will check for newer signed drivers.
For the most current graphics drivers, visit the GPU manufacturer's website directly: nvidia.com/drivers for NVIDIA, amd.com/support for AMD, or intel.com/support for Intel integrated graphics. Manufacturer sites publish newer drivers than Windows Update often does.
Restart after installing updates or drivers to ensure they take full effect.
Why this works: Outdated drivers — especially graphics and storage drivers — cause the operating system to work harder to compensate for inefficiencies in how it communicates with the hardware. Current drivers often include explicit performance improvements.
Expected result: The system is running current Windows updates and up-to-date drivers for its core hardware components.
-
Step 6: Check CPU temperature and cooling
Download a free tool such as HWMonitor or Core Temp and run it while the computer is doing a moderate task. Check the CPU temperature readings. For most desktop and laptop CPUs, temperatures below 80°C under load are acceptable; sustained readings above 90°C indicate a cooling problem.
If temperatures are high, shut the computer down and inspect the vents. On laptops, use a can of compressed air to blow dust out of the vents with short bursts. On desktops, open the side panel and clear dust from all fans and heatsinks.
If the machine is several years old and temperatures remain high after cleaning, the thermal paste between the CPU and its cooler may need replacing — a task most users can do with a guide, some isopropyl alcohol, and a tube of thermal compound.
Why this works: A CPU that is too hot reduces its own clock speed automatically — a safety mechanism called thermal throttling. This can cut performance dramatically without any error message or warning, making the computer feel far slower than its specifications suggest.
Expected result: CPU temperatures sit in a healthy range under load, and the computer no longer throttles its speed to stay cool.
Thermal throttling is especially common in laptops that have never been cleaned. Even a modest dust clog can cut airflow enough to force sustained throttling.
-
Step 7: Assess whether a hardware upgrade makes sense
If the steps above improve but do not fully resolve the slowdown, open Task Manager during normal use and note which resource consistently hits its limit. If RAM usage sits at 90%+ during everyday tasks, adding RAM is the most cost-effective upgrade. If the computer has a traditional spinning hard drive (HDD), replacing it with an SSD is the single upgrade that most dramatically transforms perceived speed.
You can identify your storage type in Task Manager > Performance > Disk: SSDs typically show very low access times (under 0.1 ms); HDDs show times measured in milliseconds (5–15 ms).
For most machines 5–7 years old with an HDD, an SSD replacement delivers a larger speed improvement than any software change — boots that took 2 minutes drop to under 20 seconds, and every application opens dramatically faster.
Why this works: Software optimisation can only recover performance that was lost to accumulation; it cannot add resources that were never there. If the hardware is genuinely undersized for modern workloads, targeted upgrades are a far cheaper alternative to buying a new computer.
Expected result: You have a clear picture of whether a RAM or storage upgrade would meaningfully improve performance, and whether it is worth pursuing before considering full replacement.
Tip
Printer Tip
Audit startup programs every few months and disable any newly added entries you did not intentionally enable.
Confirm it's working
Tick these off to be sure the problem is fully resolved.
Keep it from happening again
A few habits that stop this problem coming back.
- Audit startup programs every few months and disable any newly added entries you did not intentionally enable.
- Keep at least 15% of your storage drive free at all times — set a calendar reminder to run Disk Cleanup or Storage Sense if needed.
- Install software only from official sources, and decline optional bundled programs during installation; they are a primary source of unwanted startup and background processes.
- Run Windows Update on a regular schedule and restart promptly after updates so performance and security fixes take effect.
- Clean laptop vents with compressed air every 6–12 months; desktop towers every 12 months or whenever fan noise increases.
Frequently asked questions
Was this guide helpful?
Your feedback helps us keep these steps accurate.
Thanks for your feedback!
Written by
The Guts Guide Editorial Team · Educational Content
Last updated
Jul 2026
Continue Reading
Pick up where you left off with the next guide in your troubleshooting journey.
Related Guides
More troubleshooting walkthroughs you may find useful.
Buying Guides
Plain-English comparisons and pre-purchase checklists — find the right printer before you buy.


